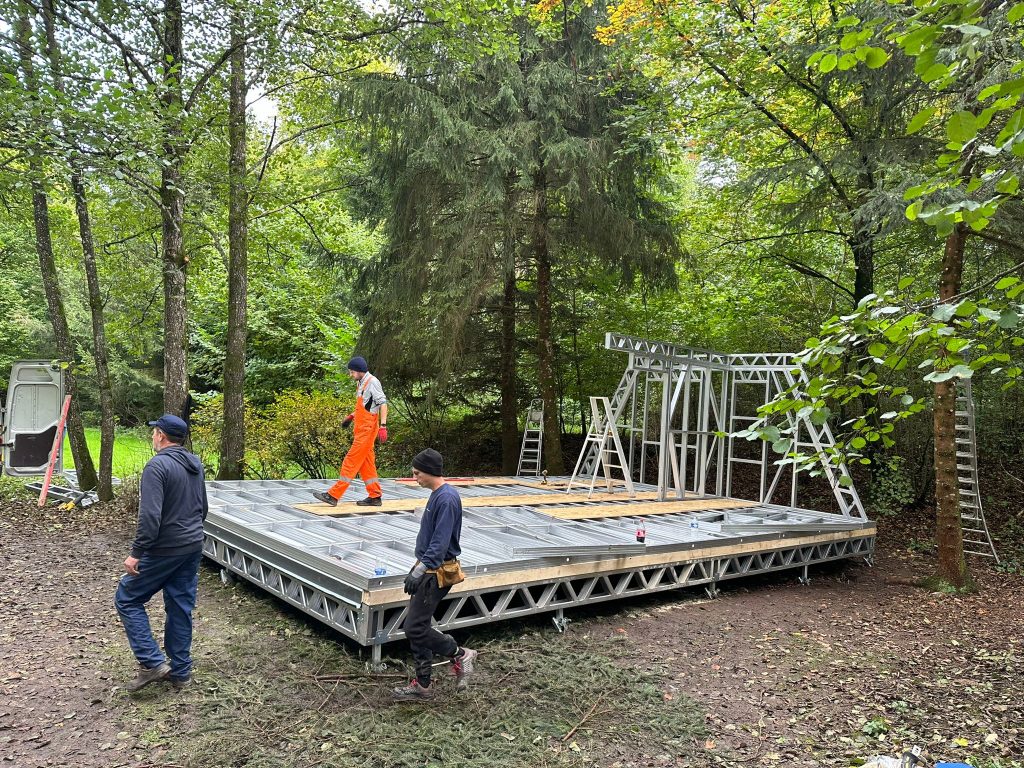
Welcome to your go-to guide for installing LiteSteelFrame systems! Whether you’re a contractor, builder, or DIY enthusiast,
Welcome to the definitive guide for installing LiteSteelFrame systems! Designed for contractors, builders, and DIY enthusiasts alike, this manual streamlines your installation process to be both efficient and safe. We’ve packed this guide with valuable tips and strategically used keywords to ensure easy navigation.

Begin with Preparation
Ready the Site
Make sure to prepare your construction site with a stable and level foundation. Starting solid is key to a successful LiteSteelFrame installation.
Inspect Components
Upon arrival, check all LiteSteelFrame components for correct labels and damage-free status. This step is crucial for a seamless assembly.
Gather Tools and Safety Equipment
Collect all necessary tools, lifting equipment, and safety gear. Having well-maintained tools and the right safety equipment is essential for an efficient and safe installation.
Brief Your Team
Take the time to review plans, roles, safety procedures, and the installation sequence with your team. A knowledgeable team is essential for project success.
Installation Steps Simplified
Step 1: Starting with Layout and Positioning
- Secure the Foundation Interface: Begin by anchoring the base track or sole plate securely to the foundation and ensure it aligns perfectly.
- Organize Frame Components: Efficiently lay out your frame components according to the construction plans. This organization sets the stage for an efficient assembly.
Step 2: Frame Assembly
- Securely erect the vertical studs to the base track, aligning them precisely.
- Connect horizontal tracks or beams to vertical studs at designated levels, ensuring a robust structure.
Step 3: Ensuring Stability through Fixing and Bracing
- Tightly fasten all connections using specified fasteners.
- Add bracing elements according to engineering designs for lateral stability, strengthening the structure’s integrity.
Step 4: Floors and Roofs Come Next
- If applicable, install and level the floor systems, fastening them securely.
- Attach roof systems to the wall frames, incorporating necessary bracing for enhanced stability.
Step 5: Quality Assurance Checks
- Thoroughly check the frame for alignment, squareness, and level, making adjustments as needed.
- Inspect all connections, bracing, and the overall structure to ensure compliance with design specifications and safety standards.
After Installation
Move on to:
- Exterior and Interior Finishing: Begin exterior cladding, roofing, and interior drywall.
- Integrate Utilities: Ensure electrical, plumbing, and HVAC systems integrate seamlessly with the LiteSteelFrame system.
- Complete Inspections and Certifications: Arrange for the necessary inspections to certify compliance with local building codes and standards.
Safety and Support
Emphasizing safety, always comply with local building codes, safety regulations, and best practices. Equip all team members with necessary safety gear and training. LiteSteelFrame remains committed to supporting you throughout the installation process. For technical support, questions, or additional resources, our support team is ready to assist.
